How to Embed a Video in Google Slides

How to Embed a Video in Google Slides
Adding videos to your Google Slides can enhance your presentation by making it more interactive and engaging. Whether you’re presenting a product demo, instructional guide, or visual example, embedding video content can elevate your slides and hold your audience’s attention. Here’s a step-by-step guide on how to embed videos into Google Slides, with helpful insights on why and how to optimise video usage in your presentations.
Why Add Videos to Google Slides?
Including videos in your slides can help you explain ideas more effectively and create a lasting impression. Here are some reasons to consider embedding video content:
- Keeps Audience Engaged: Videos offer a change from text, helping to hold attention.
- Clearer Explanations: They work well for detailed or complex information.
- Boosts Memorability: Visual and auditory elements make content stick.
- Professional Touch: Videos add polish and show thoughtfulness in your presentation.
- Supports Diverse Learning Styles: Videos help those who learn better visually or auditorily.
- Creates Emotional Impact: Video can convey tone, emotion, and relatability better than text.
Ways to Embed Video (Shortlist)
- Use Google Drive to Insert a Video
- Embed a YouTube Video
- Use Clipara for Customisable, Branded Video Content
Let’s go over each option and how to implement them in Google Slides.
Method 1: Using Google Drive to Insert a Video
To insert a video from your computer or gallery, You’ll first have to upload it to your Google Drive. Once stored in Google Drive, you can easily insert them into your slides.
Steps
1. Upload to Google Drive: Go to Google Drive and upload your video by dragging it into your Drive or clicking New > File upload. Ensure the video format is compatible (e.g., MP4, MOV).

2. Select the Slide: Open your Google Slides presentation and choose the slide where you want to add the video.

3. Insert Video: Click on Insert in the top menu, then select Video.

4. Select from Google Drive: A dialog box will appear. Choose the Google Drive tab in the dialog box. Find your video and click Insert.

5. Position and Resize: Once the video is inserted, you can drag it to reposition and resize it as needed.

6. Adjust Playback Settings: Click on the video to access options like autoplay, muting, and more under the Format Options sidebar. And that’s it!

Pros
- Seamless Integration: Easy access to videos already stored in your Google Drive.
- Manageable File Sizes: Keeps your presentation light by linking to the video instead of embedding it.
Cons
- Requires Internet Access: Like the YouTube method, it needs an internet connection for playback.
- Limited to Google Drive Files: Only videos stored in your Google Drive can be used.
Tips
- Organise your Drive files to make it easier to find videos for presentations.
- Check the video’s sharing settings to ensure they’re accessible during your presentation.
Create seamless video experiences without code with Clipara.
Start using Clipara for free and create video experiences that delight your customers.
Get started freeMethod 2: Embedding a YouTube Video
YouTube is a great resource for finding videos. Embedding directly from YouTube keeps your file size small and allows for access to a vast library of content.
Steps
1. Find Your Video: Go to YouTube and locate the video you want to use. Click the Share button below the video and copy the URL.

2. Select the Slide: Open your Google Slides presentation and choose the slide where you want to add the video.

3. Insert Video: Click on Insert in the top menu, then select Video.

4. Paste the URL: A dialog box will appear. Choose the YouTube tab in the dialog box and paste the link.

Select the video and click Insert.

You may also directly search for videos in the dialog box by typing in keywords then browse through the videos.

5. Adjust Size and Position: Drag the corners to resize the video frame and move it around your slide.

6. Adjust Playback Settings: Click on the video to access options like autoplay, muting, and more under the Format Options sidebar.

Pros
- Access to Diverse Content: Use a variety of videos available online.
- Lightweight: The presentation size doesn’t increase significantly.
Cons
- Internet Connection Needed: Requires a stable internet connection to play.
- Ads and Distractions: Videos may include ads or links that could distract from your presentation.
Tips
- Preview the video to ensure it’s ad-free or doesn’t contain interruptions.
- Make sure you have a good internet connection when presenting.
Method 3: Using Clipara to Link to Customisable, Branded Video Content
While Google Slides doesn’t support playing videos from certain platforms directly, you can create a thumbnail linked to a video hosted on Clipara. This approach maintains the visual appeal of your presentation while directing your audience to the video online. Clipara is an excellent choice for adding polished, branded video content. It allows you to create video carousels or grids, ideal for testimonials, tutorials, or product demos.
Unlike YouTube, which can distract viewers with unrelated content or ads, Clipara offers a seamless viewing experience focused solely on your material. You can customise colors, logos, and CTA buttons to ensure a fully branded experience.
Steps to Embed a Video with Clipara:
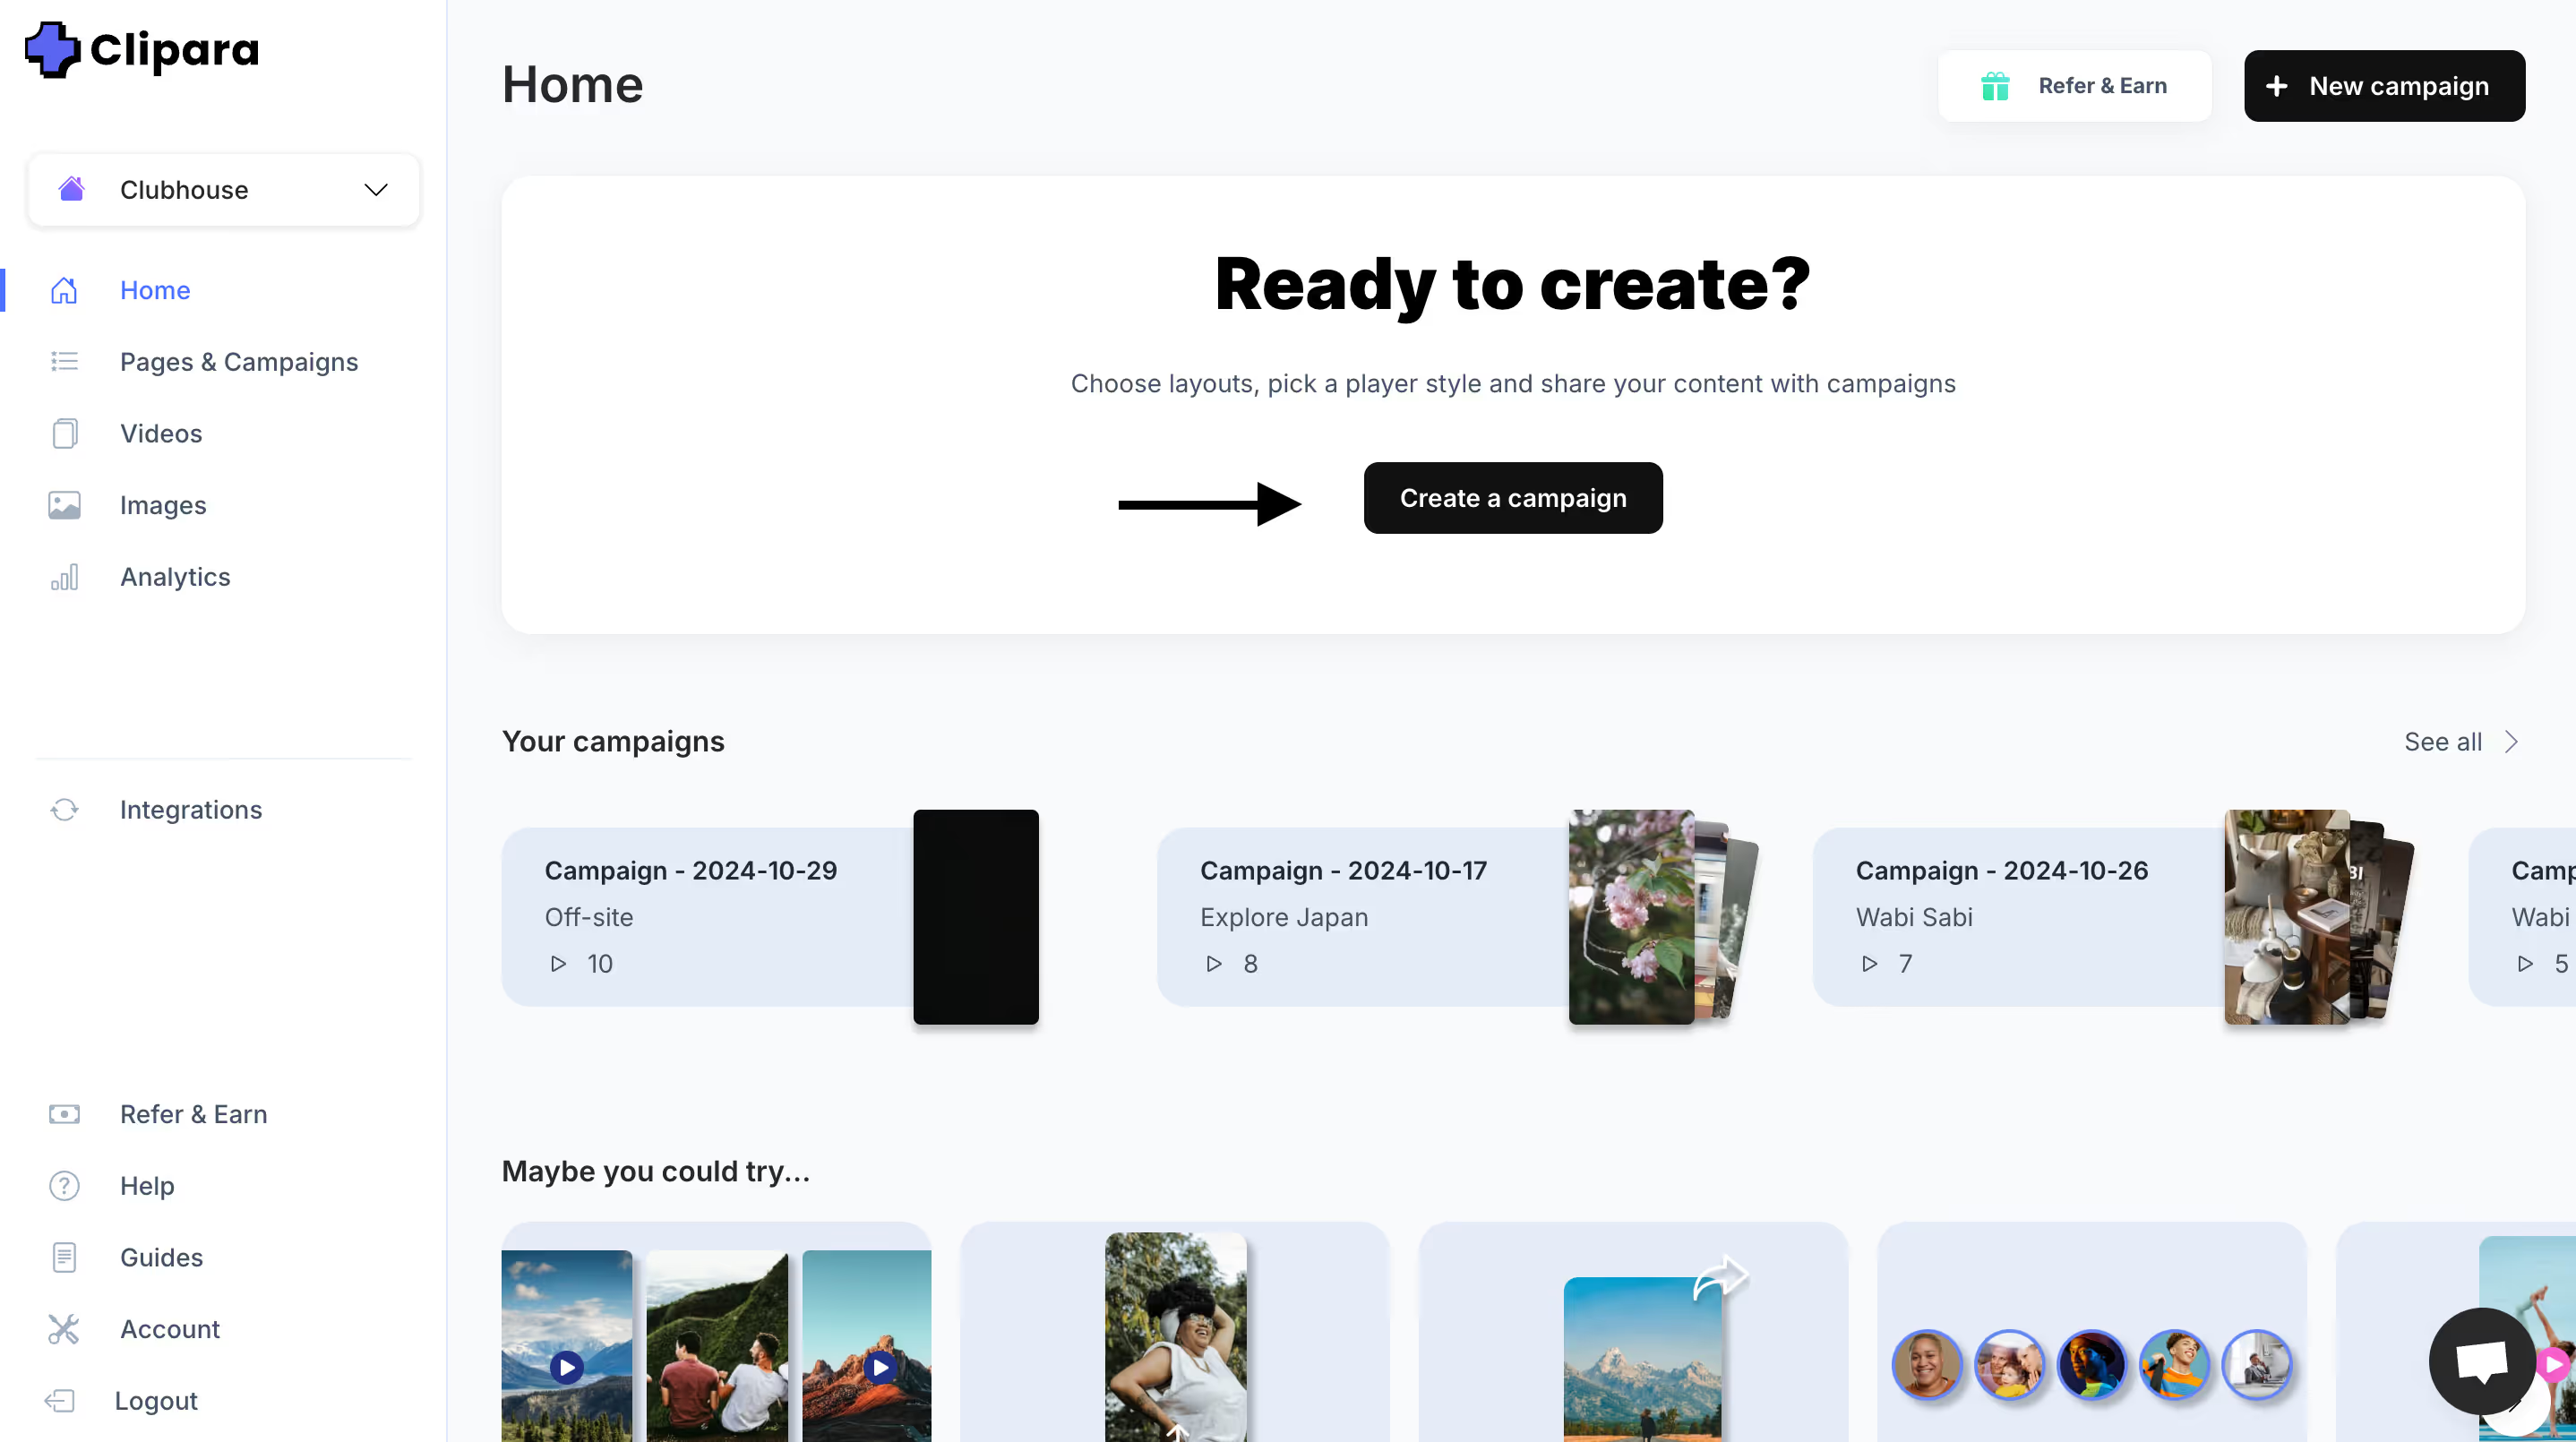
1. Create a Campaign: Start by creating a campaign on the Clipara homepage.

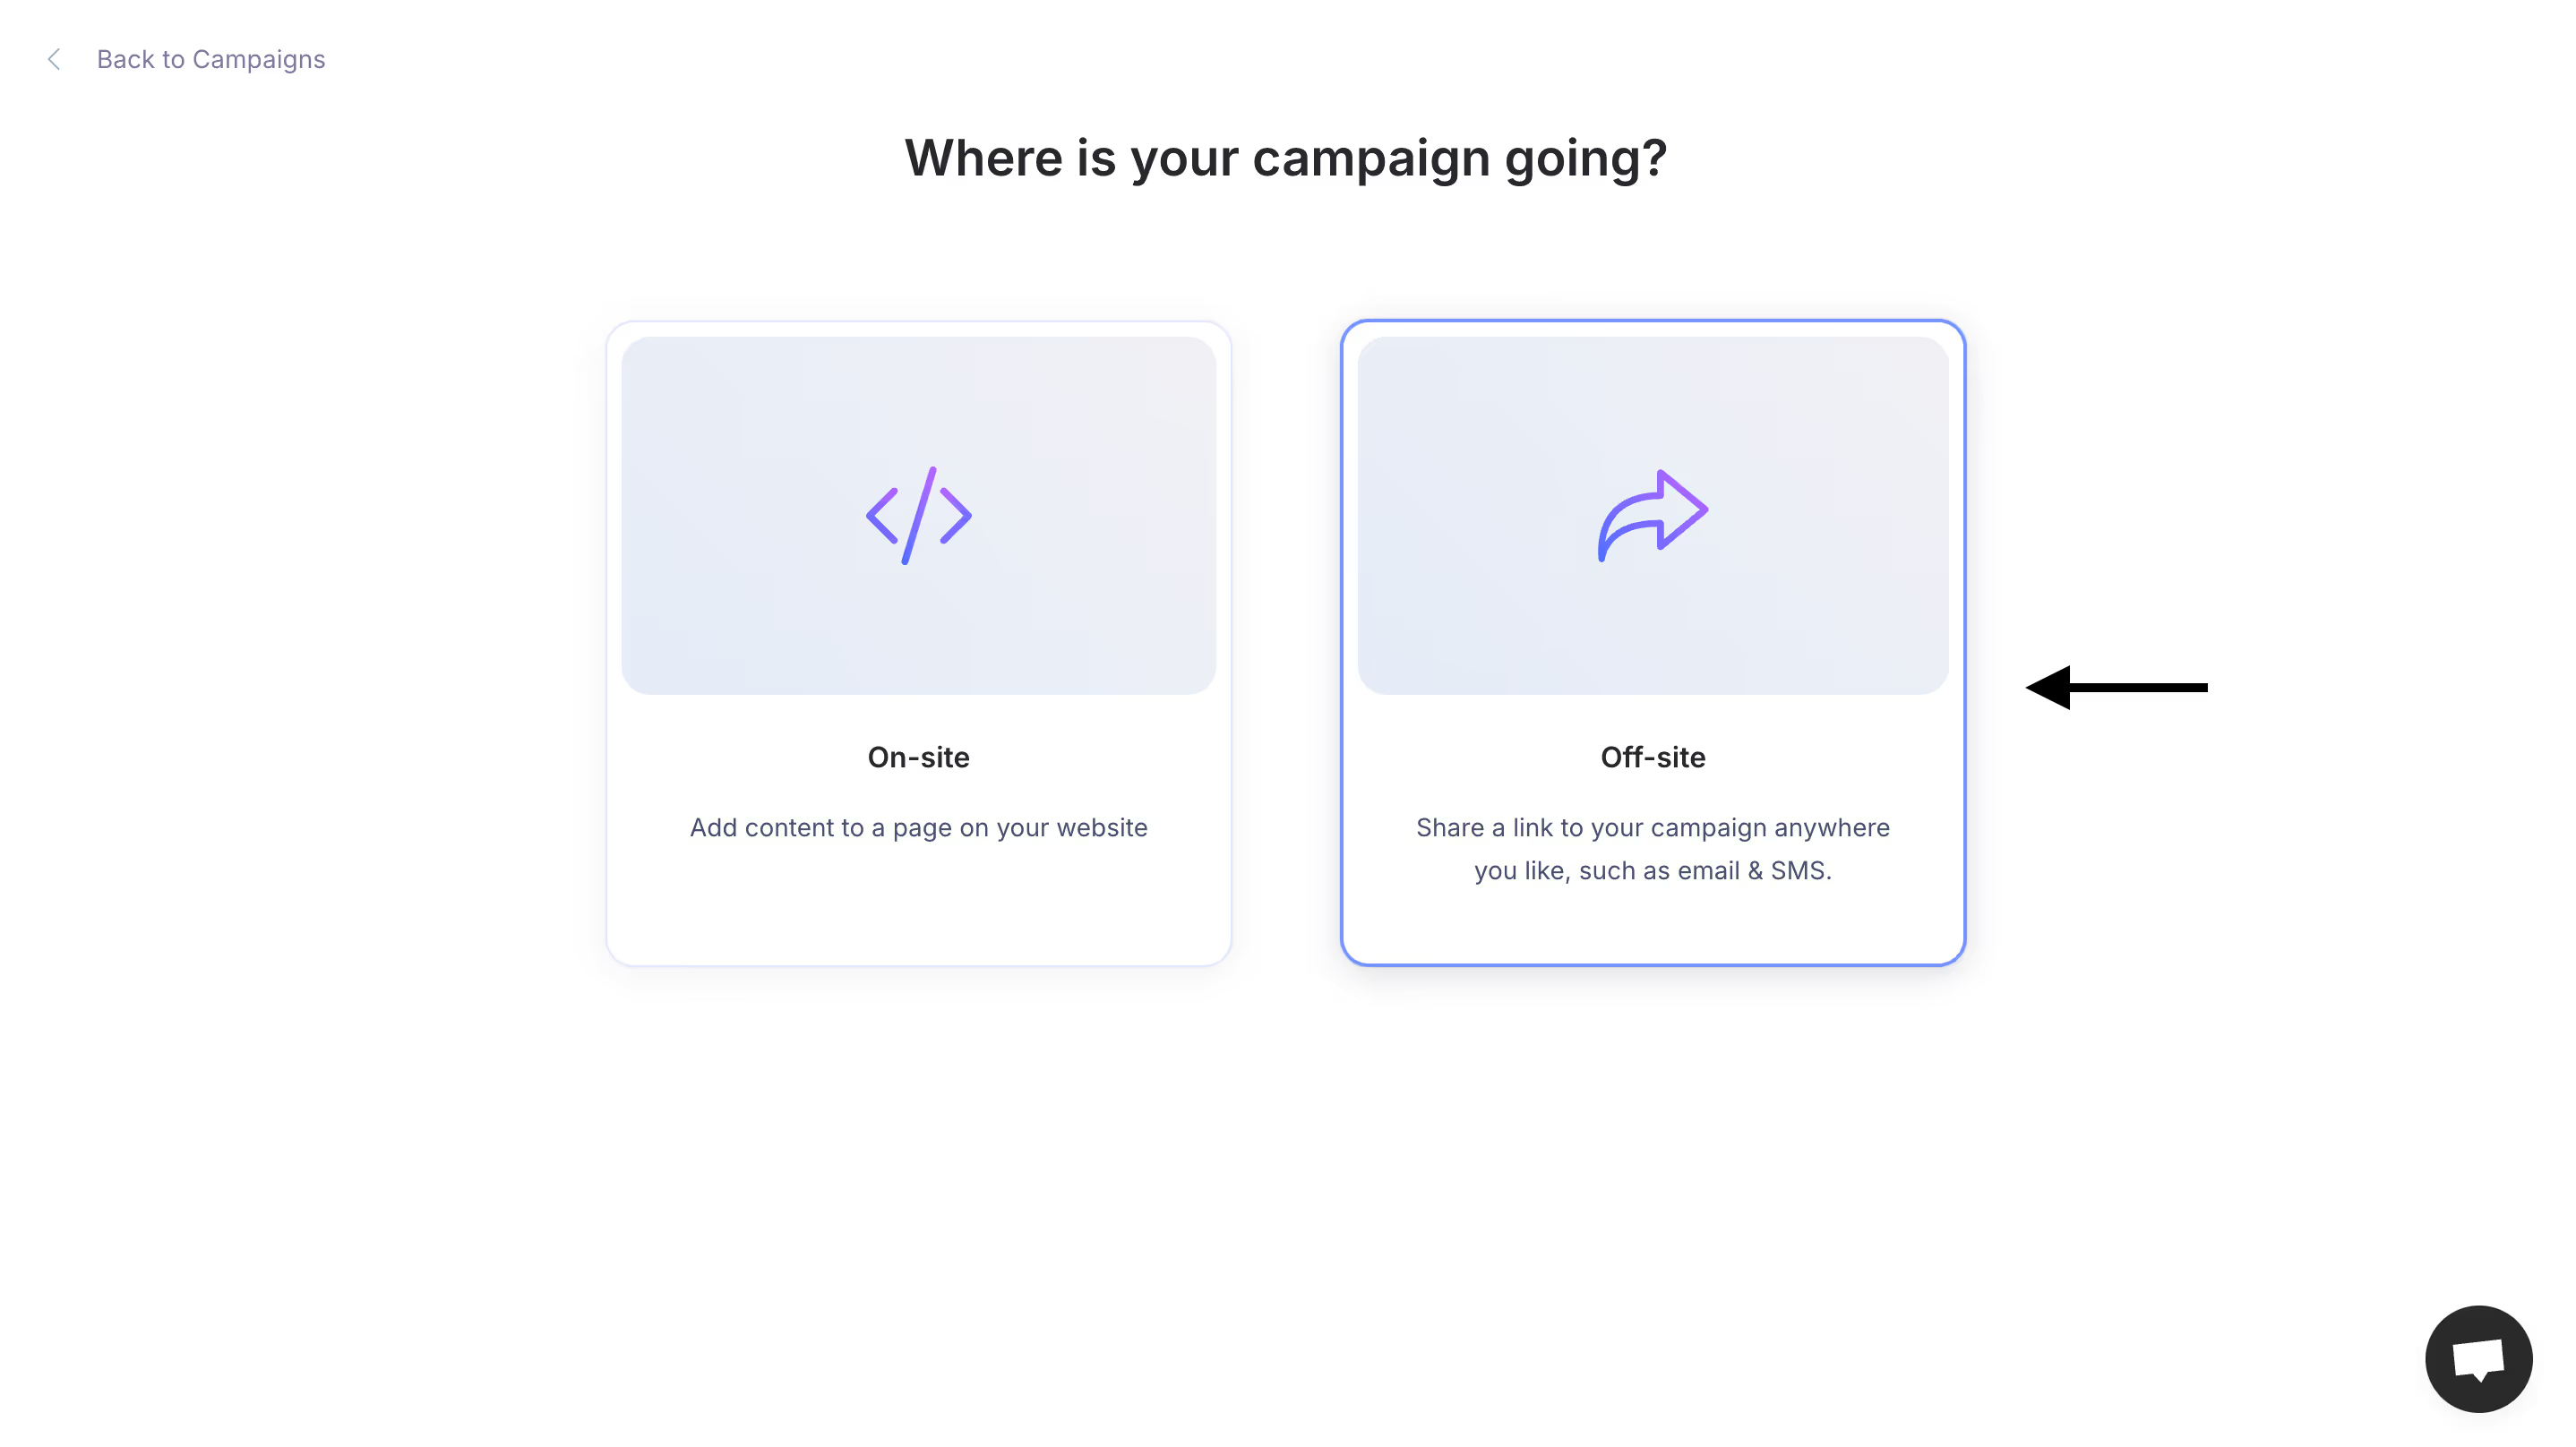
2. Select Campaign Type: Choose the Off-site campaign type.

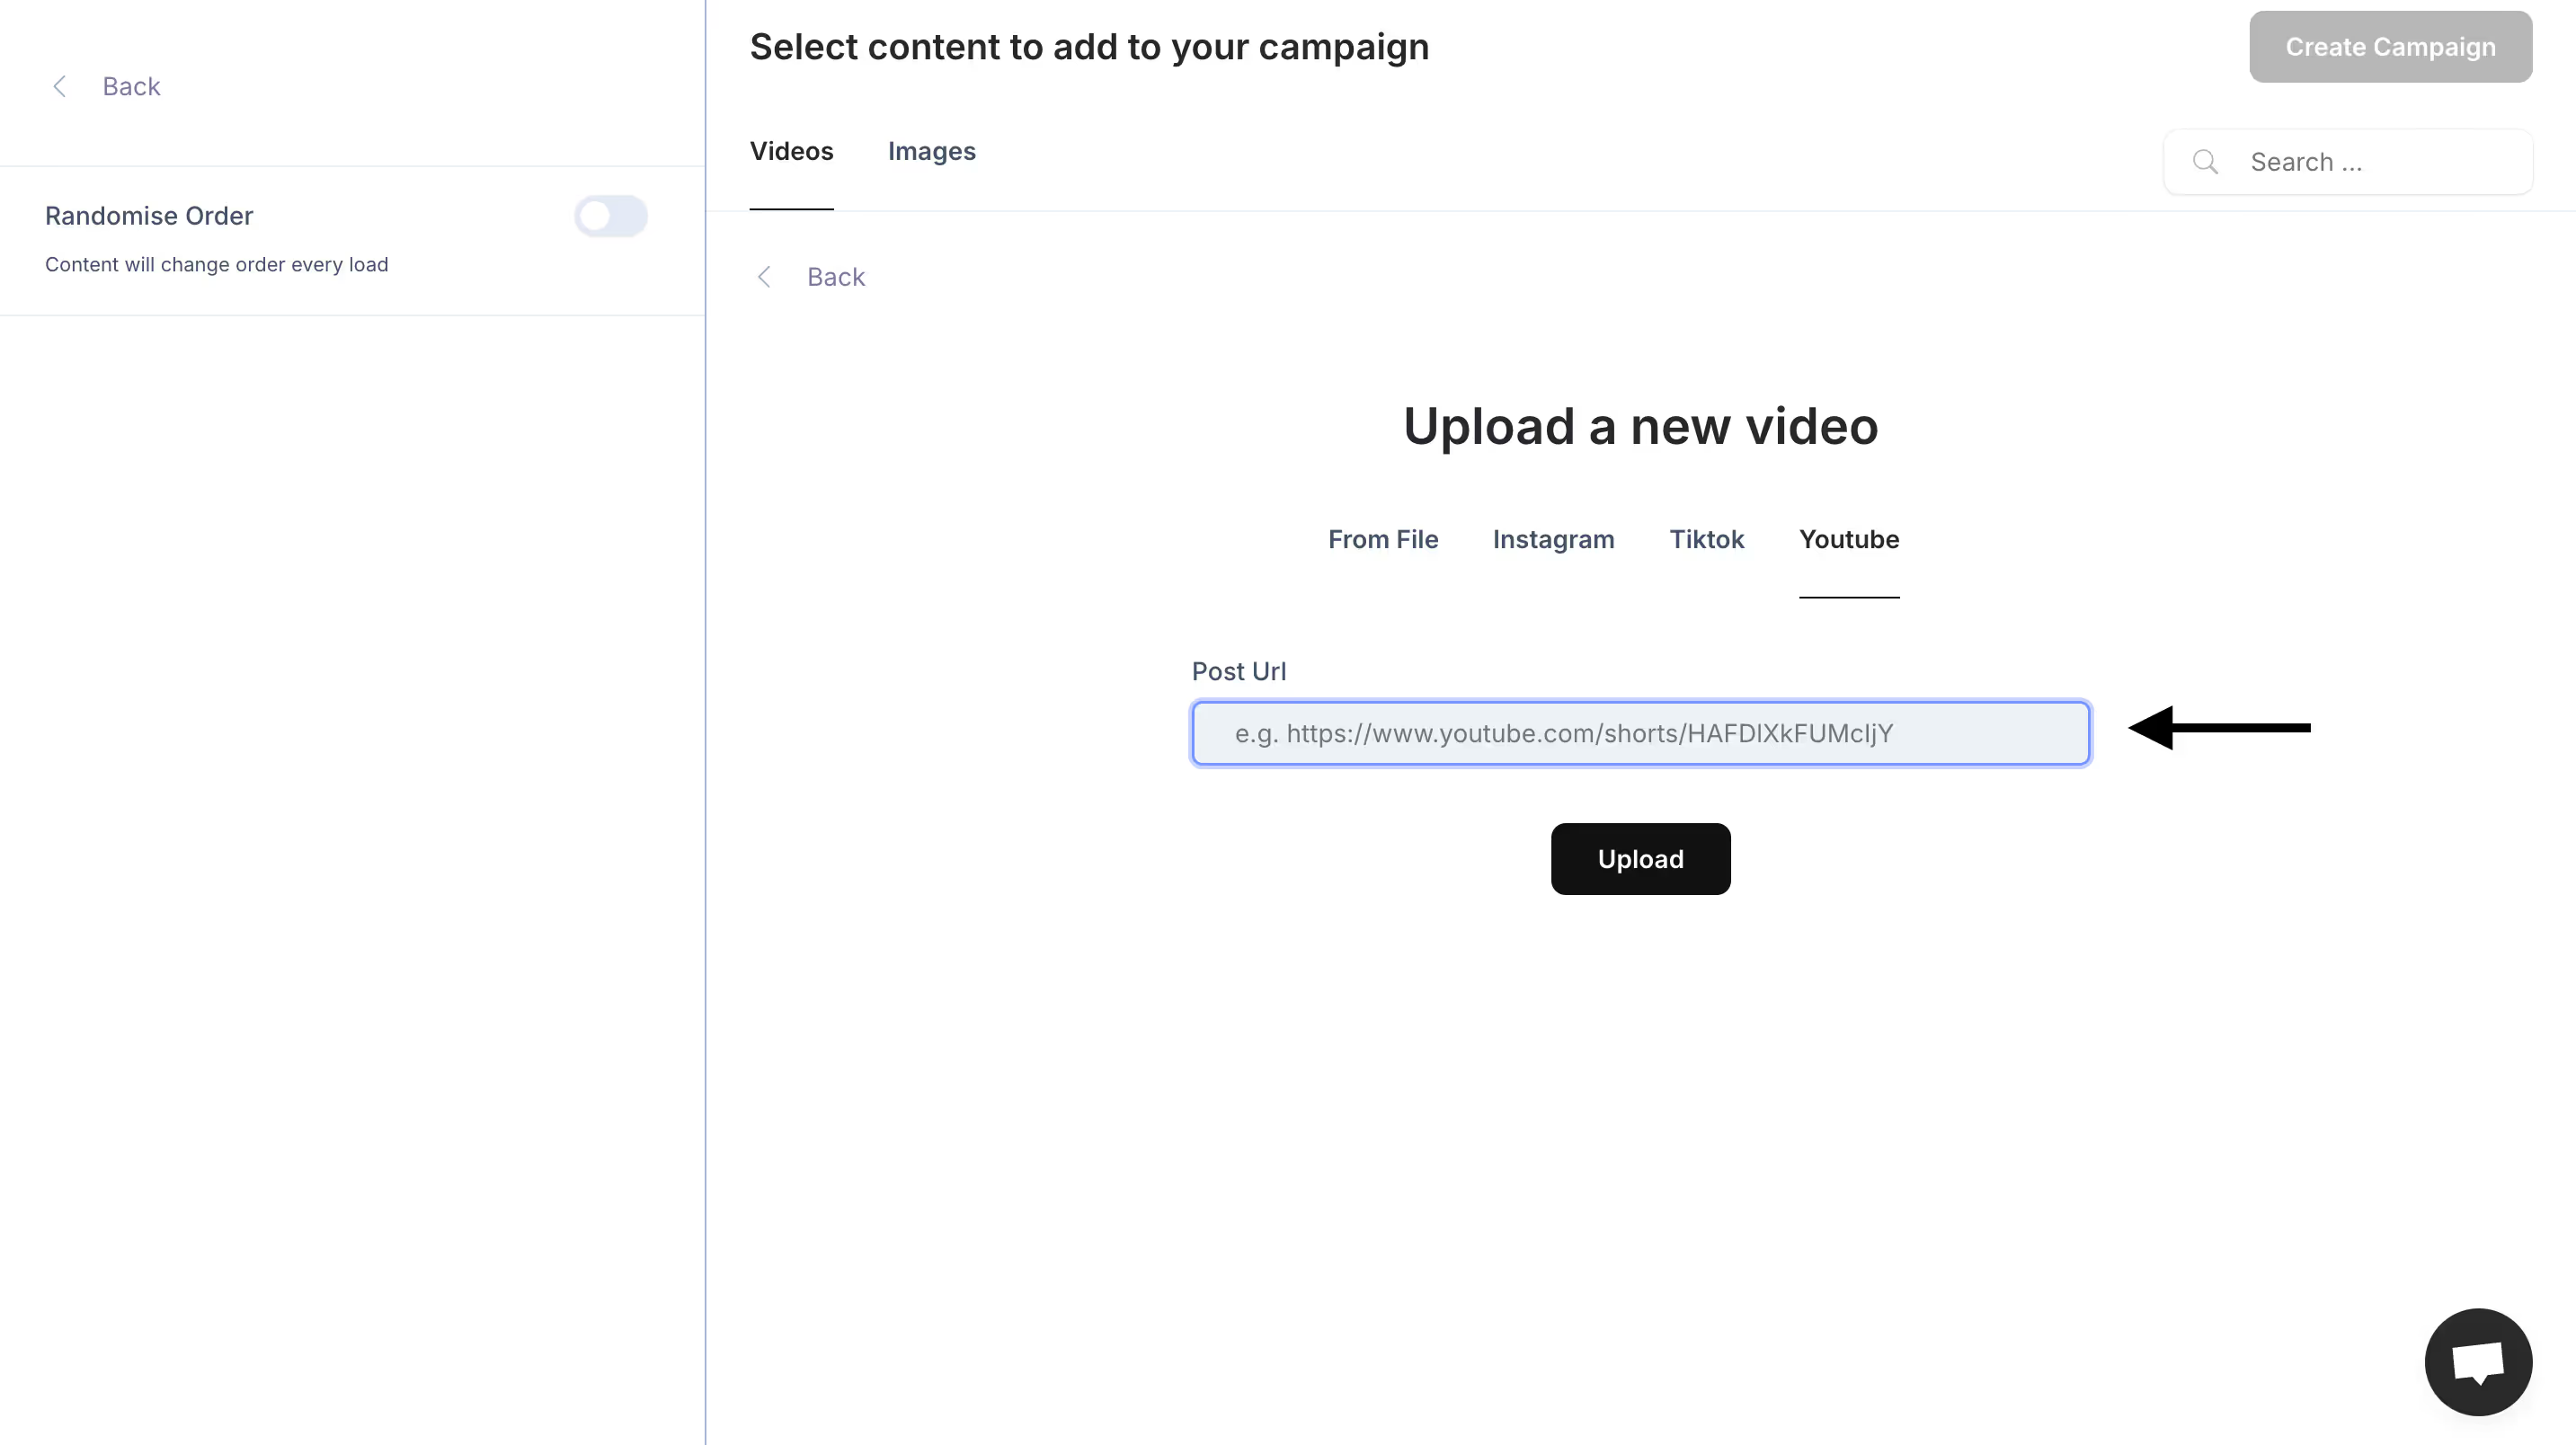
3. Add Video Content: Click 'Add Video' to upload or select videos from your library. You can also import videos from Instagram, TikTok, and YouTube by pasting the video URL.

You can even pull in videos directly from Instagram, TikTok, and YouTube by simply pasting the video URL and clicking Upload.

Once uploaded, you can rename the video as needed. Once done just click Continue.

Select a single video or multiple videos you would like to include in a carousel. On the left, drag them to reorder them if you want to. Once selected, click Create Campaign in the top left.

4. Customise Your Campaign: Customise the experience to look exactly how you want using the design panel on the left hand side. You can add your brand colors, logos, and CTA buttons to prompt specific actions (like Explore Now or Learn More).

5. Preview and Save: Preview your work by clicking on the desktop or mobile icons in the top right. Once you're happy with all of your customisations, click Save.

6. Get Your Link: Copy the Clipara-generated link for use in the slides.

7. Create a Thumbnail: Design a thumbnail with a play button overlay using tools like Canva or Add Play Button to Image. Download your new thumbnail.

8. Insert Thumbnail: Go to Insert > Image > Upload from computer.

Next, right click the image and select Insert in the menu. Select Link, then paste the Clipara-generated link. And that’s it!

Now, when you click on your image while presenting, you’ll be redirected directly to your Clipara video page for a branded, distraction-free viewing experience, just like this:

Tips:
- Explore Clipara’s layout options: Test Clipara’s video grids and carousels to keep your presentation engaging.
- Add CTAs: Use built-in CTA buttons like “Shop Now” for actionable slides.
- Customise Branding: Add your colors and logos to keep videos consistent with your brand.
- Mix Video Types: Embed different types of videos (testimonials, tutorials) to add variety and depth to your slides.
Pros
- Branded, No Ads: Clipara’s fuly customisable layouts focus on your content, distraction-free.
- Engaging Interactivity: Shoppable features encourage audience interaction.
- Cross-Device Compatibility: Videos play seamlessly across mobile and desktop devices.
Cons:
- Setup required: Requires a Clipara account to get started.
Conclusion
Incorporating videos into your Google Slides presentations can significantly enhance your message and engage your audience. Whether you choose to upload videos from your computer to your Google Drive, embed YouTube content, or creating interactive content with Clipara, each method offers unique advantages. Choose the method that best suits your content, audience, and presentation style for a more engaging and effective experience. You can get started with Clipara for free here.


-min.avif)