How to Make Horizontal Video Vertical: A Simple Guide
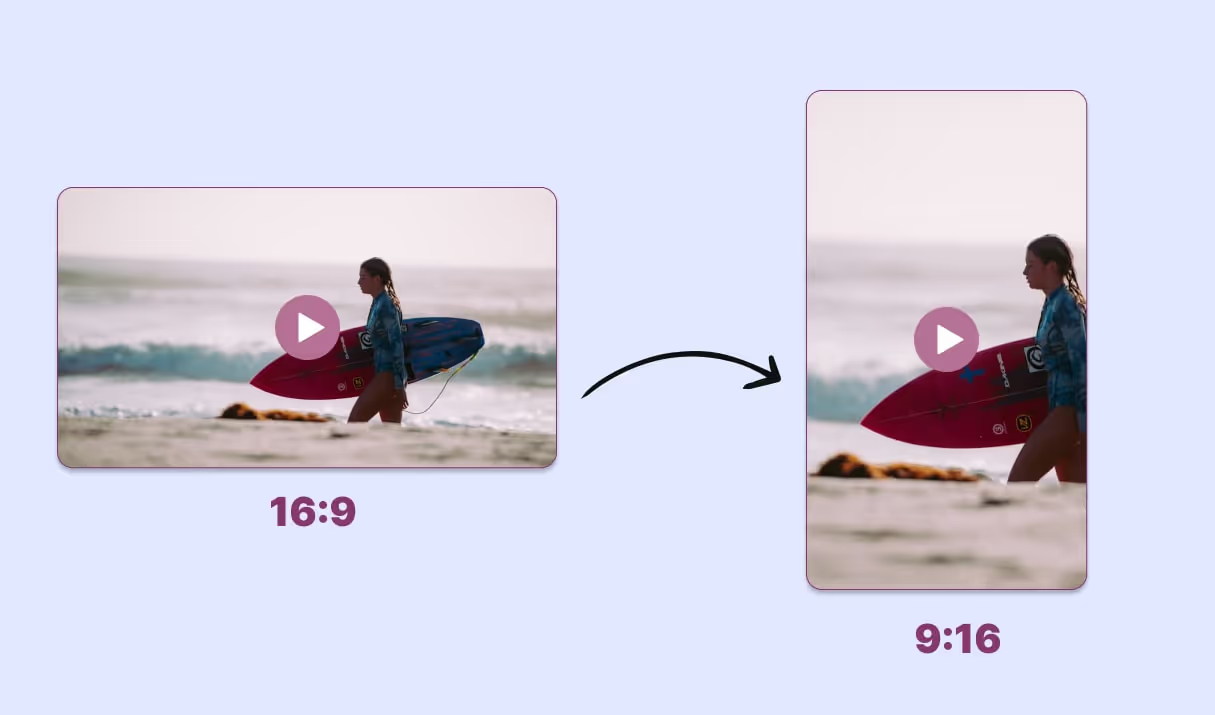
If you've ever filmed a video in landscape mode (also known as horizontal) and later realized that you need it in portrait mode (vertical), you're not alone. This is a common challenge, especially when you're repurposing YouTube content for Instagram Stories, Facebook Reels, or TikTok.
Converting horizontal videos into vertical ones doesn't have to be a headache, though. In fact, there are a variety of simple methods to get the job done, whether you're looking for a quick fix or a more professional solution. And don't worry—this guide is designed to be easy to follow, even if you're not a video editing expert.
So, grab your footage, and let's jump into how you can make horizontal video vertical, without the stress. Along the way, we'll also take a look at some cool tools and platforms like Clipara that can help you display your newly converted vertical videos in sleek carousels, grids, and other dynamic layouts on your website.
What is Vertical Video?
Vertical video is exactly what it sounds like—taller than it is wide. Unlike the widescreen, horizontal format we’re used to (think TVs or YouTube on desktop), vertical video is rotated 90 degrees and presented in a portrait orientation. It’s made to fit naturally on mobile devices, matching the way we hold our phones upright most of the time.
Essentially, instead of forcing viewers to turn their phones sideways or squint at a shrunken horizontal video, vertical videos take full advantage of the screen, offering a seamless and immersive experience.
Key Characteristics of Vertical Video
- Mobile-first Design: Vertical videos fill the entire phone screen when viewed upright, delivering a full-screen experience.
- Effortless Creation: Simply hold your phone upright and start recording—no extra steps required.
- Social Media Default: Platforms like TikTok, Instagram Stories, and YouTube Shorts thrive on vertical videos, making them the go-to format for creators.
Why Vertical Video?
Before we dive into the "how," let’s talk about the "why."
With the rise of mobile-first platforms like Instagram, TikTok, and YouTube Shorts, vertical videos have become the standard. Here’s why:
- Better Engagement: Vertical videos take up more screen space on mobile devices. This means they naturally grab more attention and are easier for viewers to interact with.
- Optimized for Social Media: These platforms are all about vertical content. Whether you're creating a quick tutorial, a product demo, or a behind-the-scenes video, the vertical format is ideal for these spaces.
- Improved Viewing Experience: Mobile users watch videos one-handed, so vertical content feels more natural and less like they’re having to adjust their screen to fit the video.
So, if you want to make your videos work better on social media, vertical is the way to go. But how do you convert that beautifully shot horizontal video into something that fits these platforms?
Let’s explore your options!
Why Convert Horizontal Video to Vertical?
Before we dive into the methods, it's worth considering why you might want to convert your horizontal video to vertical. The primary reason is user experience. Most social media platforms are optimized for vertical videos. This orientation fills up more of the user’s screen, making it more engaging and attention-grabbing. Plus, vertical videos often perform better in terms of reach and engagement rates, so optimizing your content for this format is a smart move.
Methods to Convert Horizontal Video to Vertical
1. Manual Cropping
How It Works:
Manual cropping is exactly what it sounds like. You select the part of the video you want to keep and crop out the sides (or top and bottom) to fit the vertical format. This method gives you control over what stays in the frame, but it does mean you’ll lose some of the original video.
Pros:
- Simple and Quick: Anyone familiar with basic video editing software can quickly crop a video.
- Complete Control: You decide what stays in the frame, so you can maintain focus on the most important elements.
- Versatility: If done well, this method works for various types of content, including talking heads, product demos, and interviews.
Cons:
- You Lose Content: Cropping means cutting off parts of the video. If there’s action or important details close to the edges, they can be lost.
- Stiff Look: If the original video wasn’t shot with vertical framing in mind, cropping can result in awkward framing and an unbalanced composition.
- Tedious Process: Cropping manually can be time-consuming if you have a lot of videos to convert.
Tip: Aim to keep your subject (e.g., a person or a product) centered in the frame. This will help balance the composition and ensure that your video looks natural when cropped.
2. Rotating the Video
How It Works:
Rotating the video 90 degrees is another option to convert it into a vertical format. This technique involves turning your horizontal footage into a portrait video, but it can be a bit tricky if the content was filmed with a landscape focus.
Pros:
- No Content Lost: Unlike cropping, rotating maintains the full content of the video.
- Quick to Do: Most editing software and mobile apps allow you to rotate videos with a simple tap.
- Convenient for Static Videos: If your video has little to no movement (e.g., a talking head, interview, or product demonstration), this method works well.
Cons:
- Awkward Framing: Videos with wide shots, large groups, or expansive landscapes can look awkward when rotated vertically.
- Potential Quality Loss: Rotating a video may distort its quality, especially if it wasn't recorded in high resolution.
- Poor User Experience: Since users are used to watching videos vertically on their phones, rotating may force them to turn their devices horizontally, which can be inconvenient.
Tip: If you decide to rotate, make sure your content is adaptable to the new orientation. For instance, if you’ve filmed something with a lot of movement, the rotation might make it look disorienting.
3. Put the Horizontal Video on a Vertical Background
How It Works:
Instead of cropping or rotating the video, you can place the horizontal video in the center of a vertical canvas. This way, the video stays the same size, and you fill the space around it with a background. The background can be blurred footage, a solid color, or any graphic that complements the video’s content.
Pros:
- No Content Loss: You keep the entire video as is.
- Professional Look: Adding a background makes the video look polished and intentional, especially if the original video is static or slow-paced.
- Flexible Design Options: You can experiment with different backgrounds and designs to create a cohesive look that matches your brand.
Cons:
- Empty Space: If not designed carefully, the empty areas can look awkward and poorly filled.
- Limited Visual Impact: This method is best suited for static or slow-moving content; fast-paced videos can appear disjointed.
- Small Video Display: The video may look smaller on screens, especially on mobile devices, as it’s centered on a vertical canvas rather than filling the screen.
- Risk of Looking Unprofessional: If the background graphic doesn’t match your brand's style or theme, it can make the final result appear disjointed and unprofessional.
Tip: To make the background look cohesive, try using a blurred version of the video or a background graphic that matches your brand. This can help create a smooth transition between the video and the surrounding space, ensuring the final product looks intentional and stylish.
4. Smart Tools (Auto-Cropping and Reframing)
How It Works:
Smart tools use AI or preset algorithms to automatically crop and reframe your horizontal video into a vertical format. These tools are great because they try to focus on the main subject of the video, ensuring nothing important gets cropped out.
Pros:
- Fast and Easy: Smart tools save you time by automatically cropping and reframing your video.
- Smart Framing: They’re good at recognizing and keeping the most important part of the video in frame.
- Consistency Across Videos: If you have multiple videos to convert, using a smart tool will maintain a consistent style and framing.
Cons:
- Not Always Perfect: Smart tools don't always get it right. They can cut out important elements or focus on the wrong aspect of your video.
- Limited Control: You lose some creative control by using automated software, and it may not always align with your vision.
- Quality Varies: Depending on the tool, the quality of the video after reframing can vary.
Tip: Try using tools like Adobe Premiere Pro that offers automated smart-cropping features. Always review the final results to ensure your content looks polished and intentional.
Create seamless video experiences without code with Clipara.
Start using Clipara for free and create video experiences that delight your customers.
Get started freeSoftware to Help You Make Horizontal Video Vertical
Now that you know the methods, let’s talk about some tools that can help you make this process easier. Whether you’re a beginner or a more advanced user, there are plenty of options out there.
1. CapCut
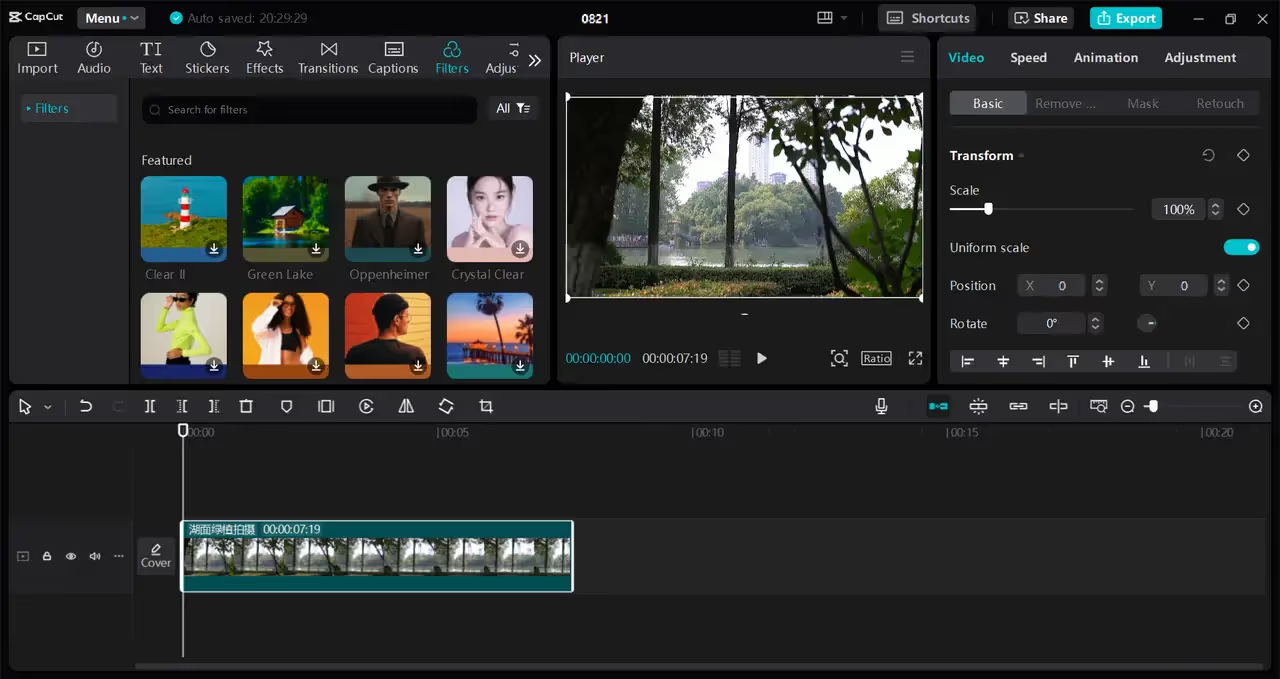
CapCut is a free, mobile-based video editing app that’s highly popular for its intuitive design and user-friendly interface. It offers a variety of editing features like trimming, text overlays, effects, transitions, and auto-captions. CapCut is perfect for creators looking for quick, simple edits on mobile devices.
Why It Works:
CapCut is simple to use and packed with features, making it ideal for fast editing. It’s especially popular with social media creators due to its ease of use and the fact that it’s free.
Pricing:
- Free: Access to most basic features.
- CapCut Pro: In-app purchases starting at $7.99/month for additional features (e.g., extra effects, transitions).
Pros:
- Completely free with no watermarks.
- Easy to use with drag-and-drop functionality.
- Great selection of filters, effects, and transitions.
- Cloud sync for easy editing across devices.
Cons:
- Limited features on the desktop version.
- No advanced features for professional-grade edits.
- Can be a bit slow with heavy editing or larger video files.
Best For:
- Social media creators and influencers looking for easy mobile editing, especially for TikToks and Instagram Reels.
- Casual content creators or beginners who need simple tools.
2. Kapwing
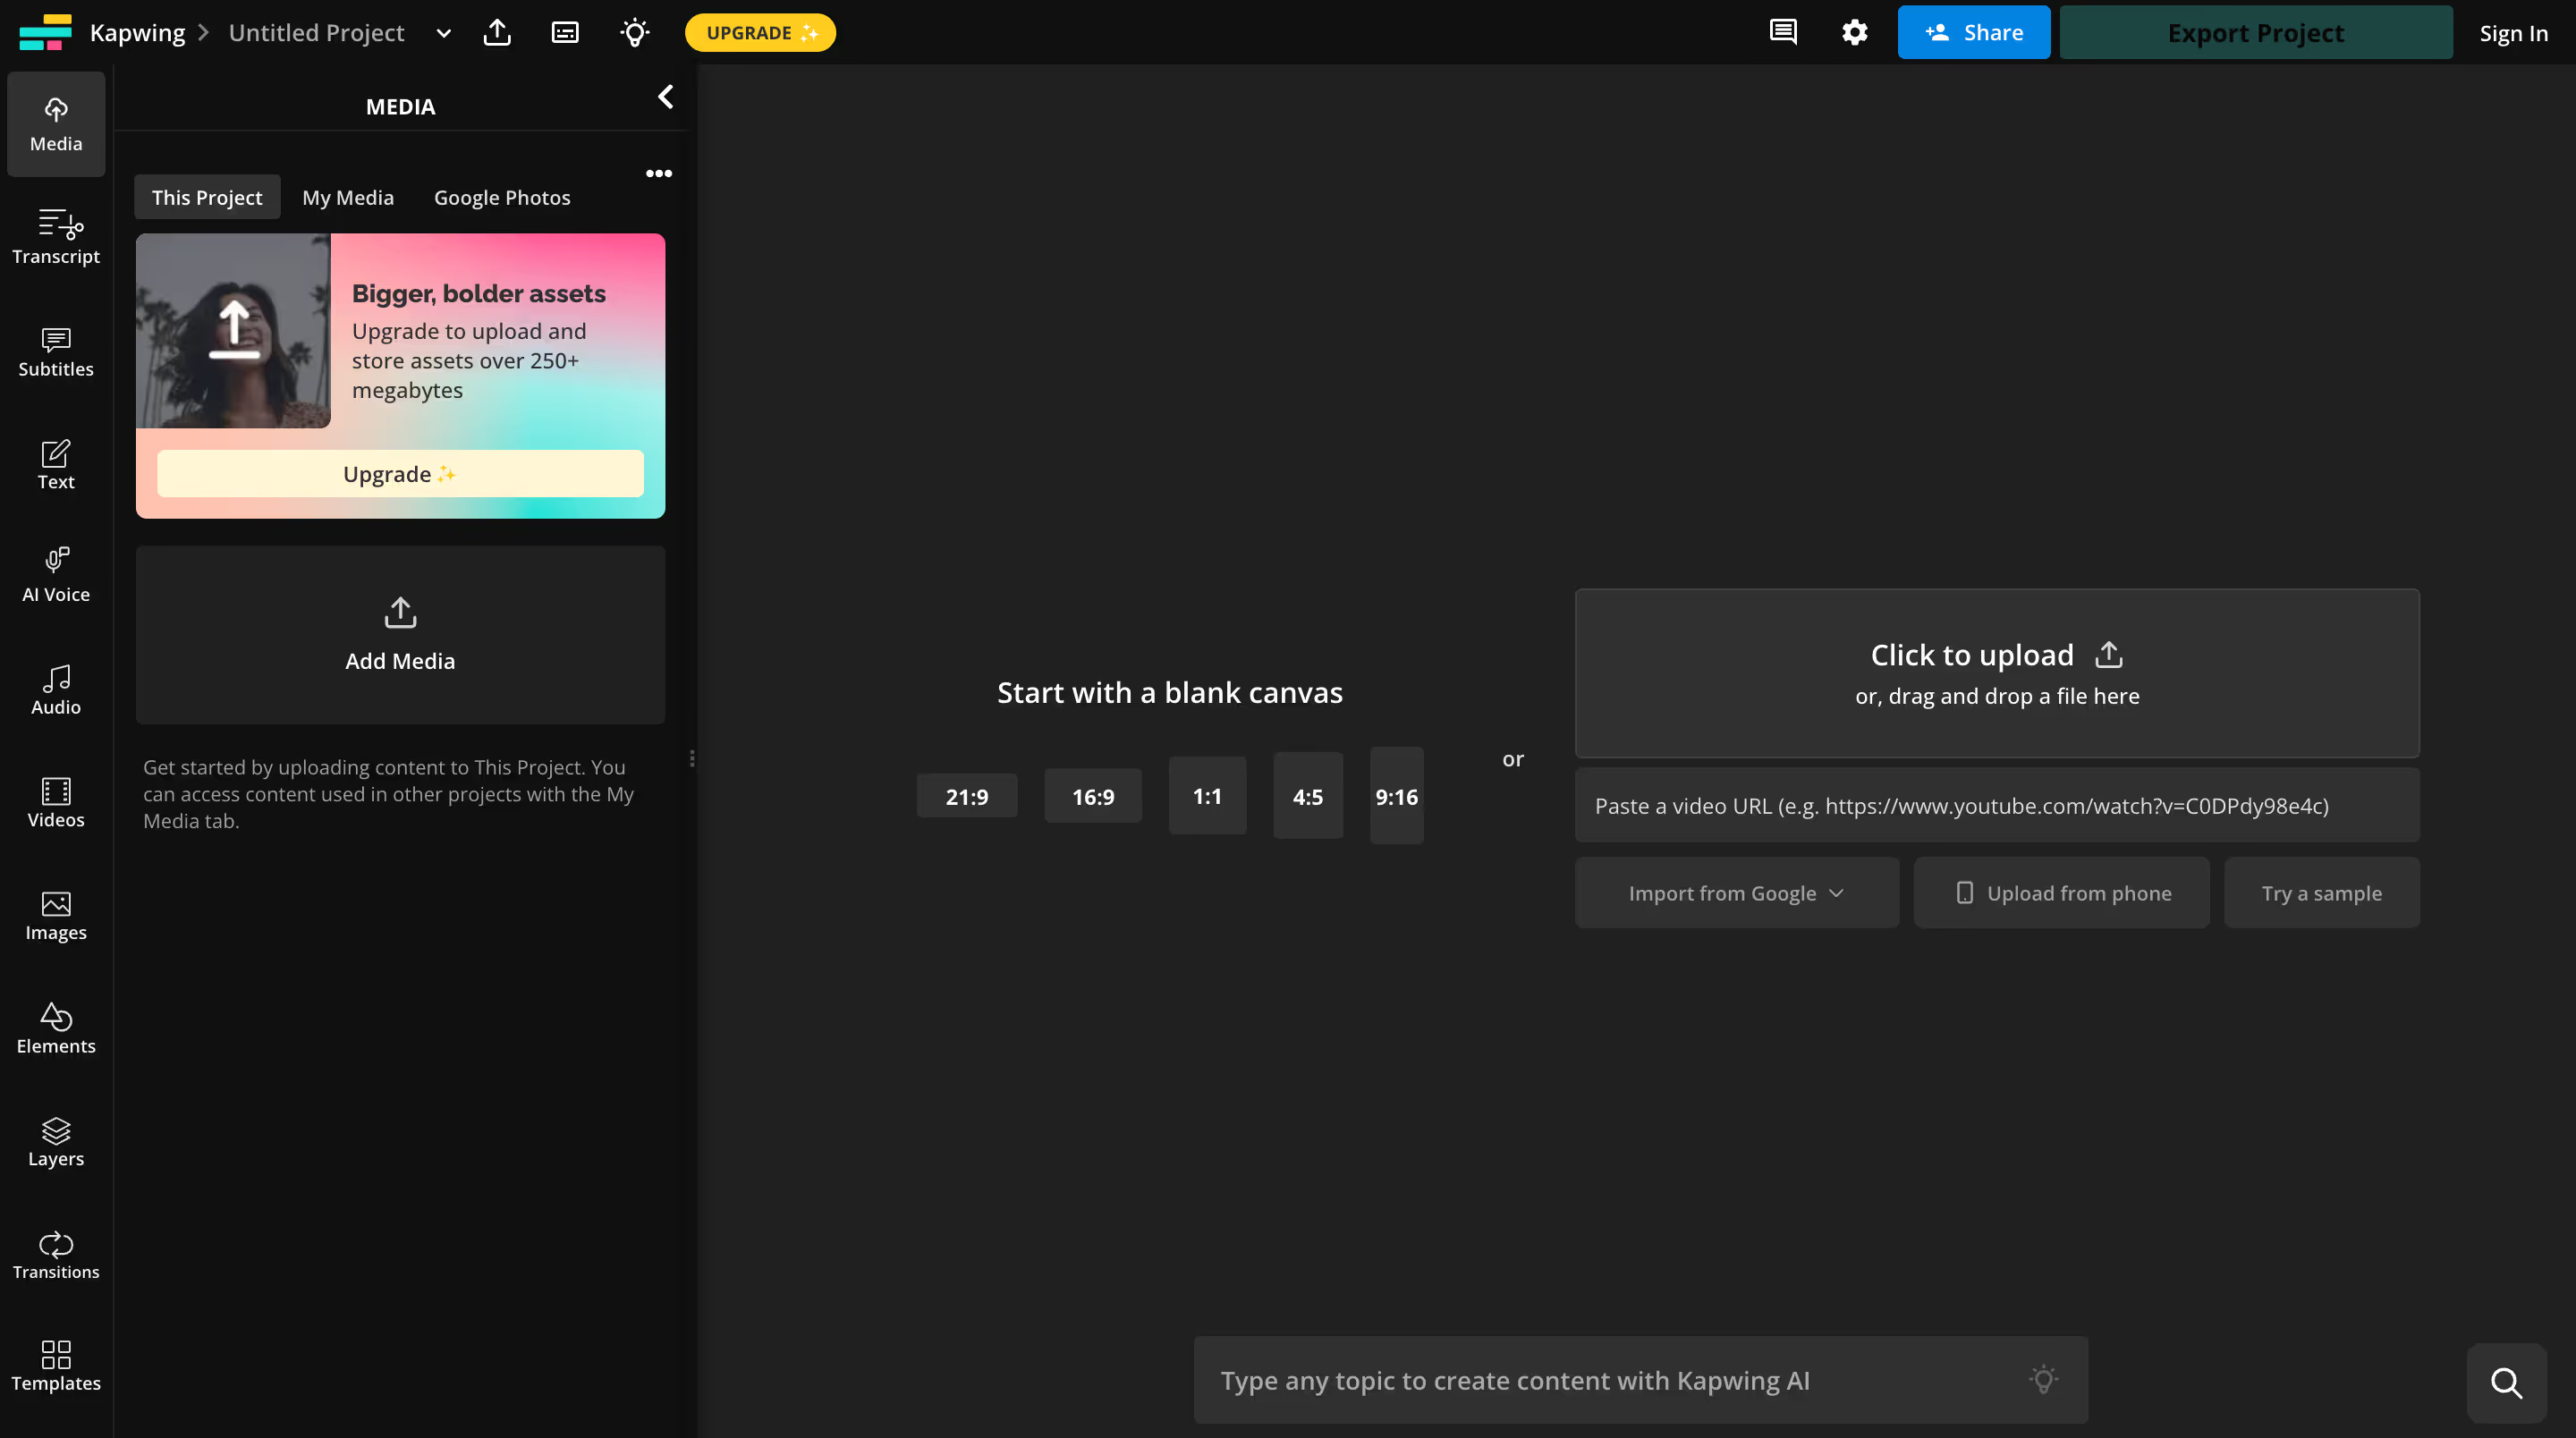
Kapwing is an online video editor that allows users to edit videos directly in their web browser. It’s a cloud-based platform with powerful editing tools for video, image, and audio. It also has AI-powered features like auto-subtitles and auto-resizing for different aspect ratios.
Why It Works:
Kapwing’s browser-based platform makes it accessible for anyone with an internet connection. It’s great for teams collaborating remotely, as it saves and edits in the cloud.
Pricing:
- Free: Limited to 4-minute videos and with watermarks.
- Pro Plan: $24/month for full features, unlimited exports, and watermark removal.
Pros:
- Simple interface and no need for software downloads.
- Extensive library of tools, including AI features like auto-resizing and text-to-speech.
- Great for creating videos for social media platforms.
- Supports a wide range of video formats.
Cons:
- Free version includes a watermark.
- Limited advanced editing features compared to desktop software.
- Can lag on larger files or more complex edits.
Best For:
- Content creators looking for an easy-to-use online editor.
- Quick social media content creation, especially for resizing and auto-cropping.
3. Adobe Premiere Pro
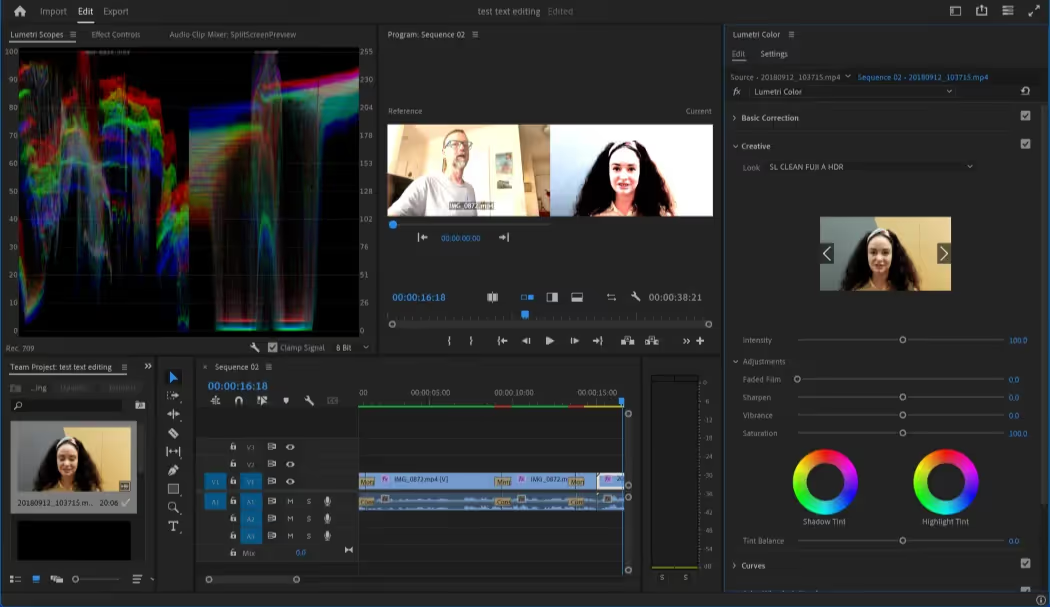
Adobe Premiere Pro is one of the most powerful and professional-grade video editing software tools available. It’s part of the Adobe Creative Cloud suite and is used by professionals in film, TV, and online content creation. Premiere Pro provides deep editing capabilities, advanced features, and seamless integration with other Adobe products like After Effects and Photoshop.
Why It Works:
Adobe Premiere Pro works for professionals who need full control over every aspect of their video editing. It’s an industry-standard tool known for its flexibility, powerful timeline editing, and wide range of advanced features.
Pricing:
- Individual Plan: $22.99/month with a 7-day free trial
- Creative Cloud All Apps: $55.99/month
Pros:
- Extremely powerful with endless editing capabilities.
- Supports multiple video formats and high-definition resolutions.
- Integrates with other Adobe software (After Effects, Photoshop).
- Regular updates with new features.
Cons:
- Steep learning curve for beginners.
- Requires a powerful computer to run smoothly.
- Expensive subscription model.
Best For:
- Professional video editors working in high-end production environments.
- Those needing advanced features like multi-cam editing, motion graphics, and detailed audio editing.
4. Descript
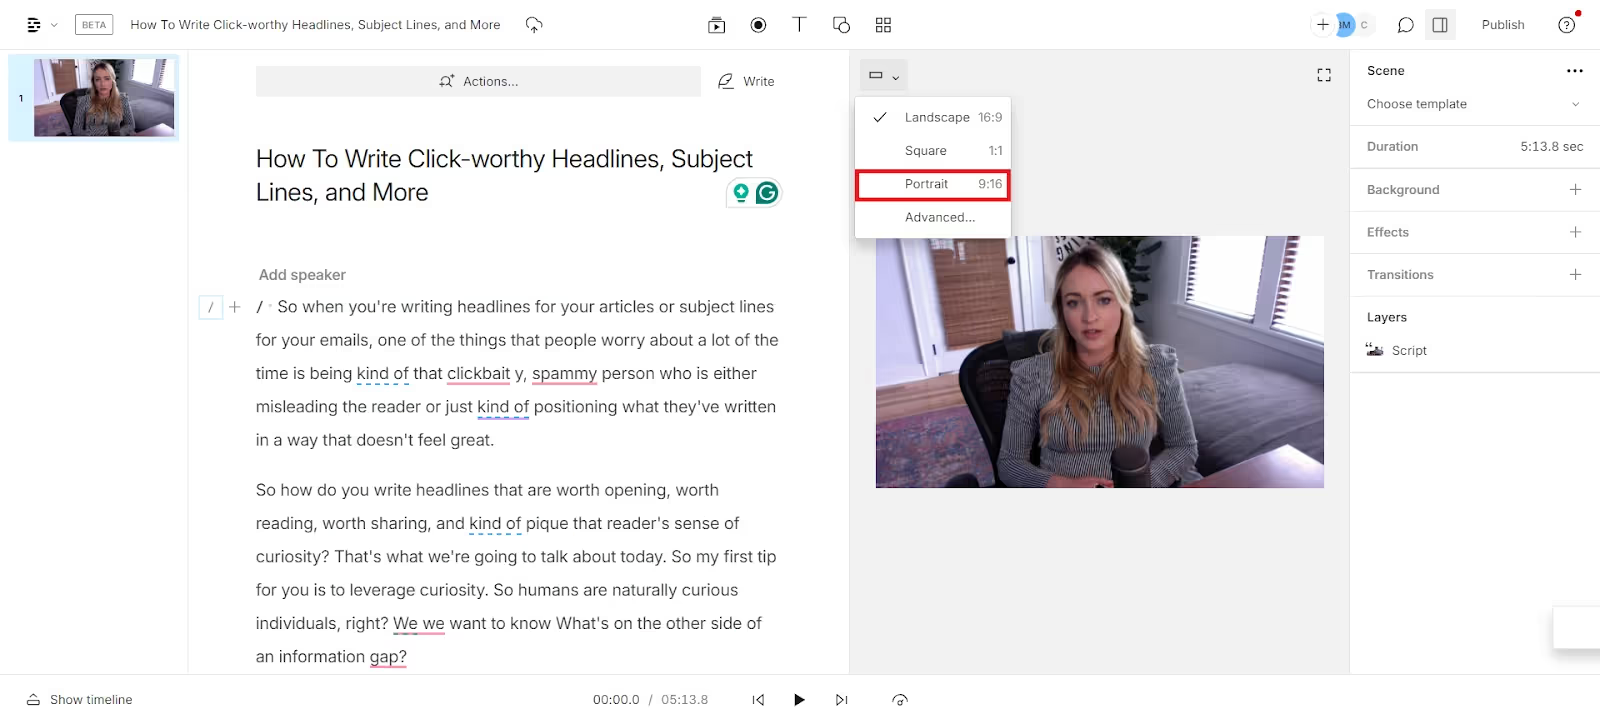
Descript is a transcription and video editing platform with a unique feature that allows you to edit video by editing text. It’s designed for podcasters, YouTubers, and content creators who need to edit both video and audio quickly. Descript uses AI to transcribe audio, enabling users to delete words or phrases in the transcript and automatically remove them from the video.
Why It Works:
Descript simplifies editing by letting you work with text. It’s especially powerful for editing interviews or podcasts where you may need to cut repetitive dialogue or awkward pauses.
Pricing:
- Free: Includes basic features with 3 hours of transcription.
- Creator: $12/month.
- Pro: $24/month (includes more advanced features like overdub and multi-clip editing).
Pros:
- Unique text-based video editing.
- AI-powered tools for automatic transcription and subtitle generation.
- Great for podcasting, interviews, and long-form video content.
Cons:
- Limited video editing features compared to full-fledged editors like Premiere Pro.
- AI transcription is not always 100% accurate.
- Requires an internet connection for cloud-based work.
- Podcasters, YouTubers, and interviewers who need to quickly edit video and audio content.
- Creators who want a faster, text-based workflow for editing interviews and presentations.
5. Riverside
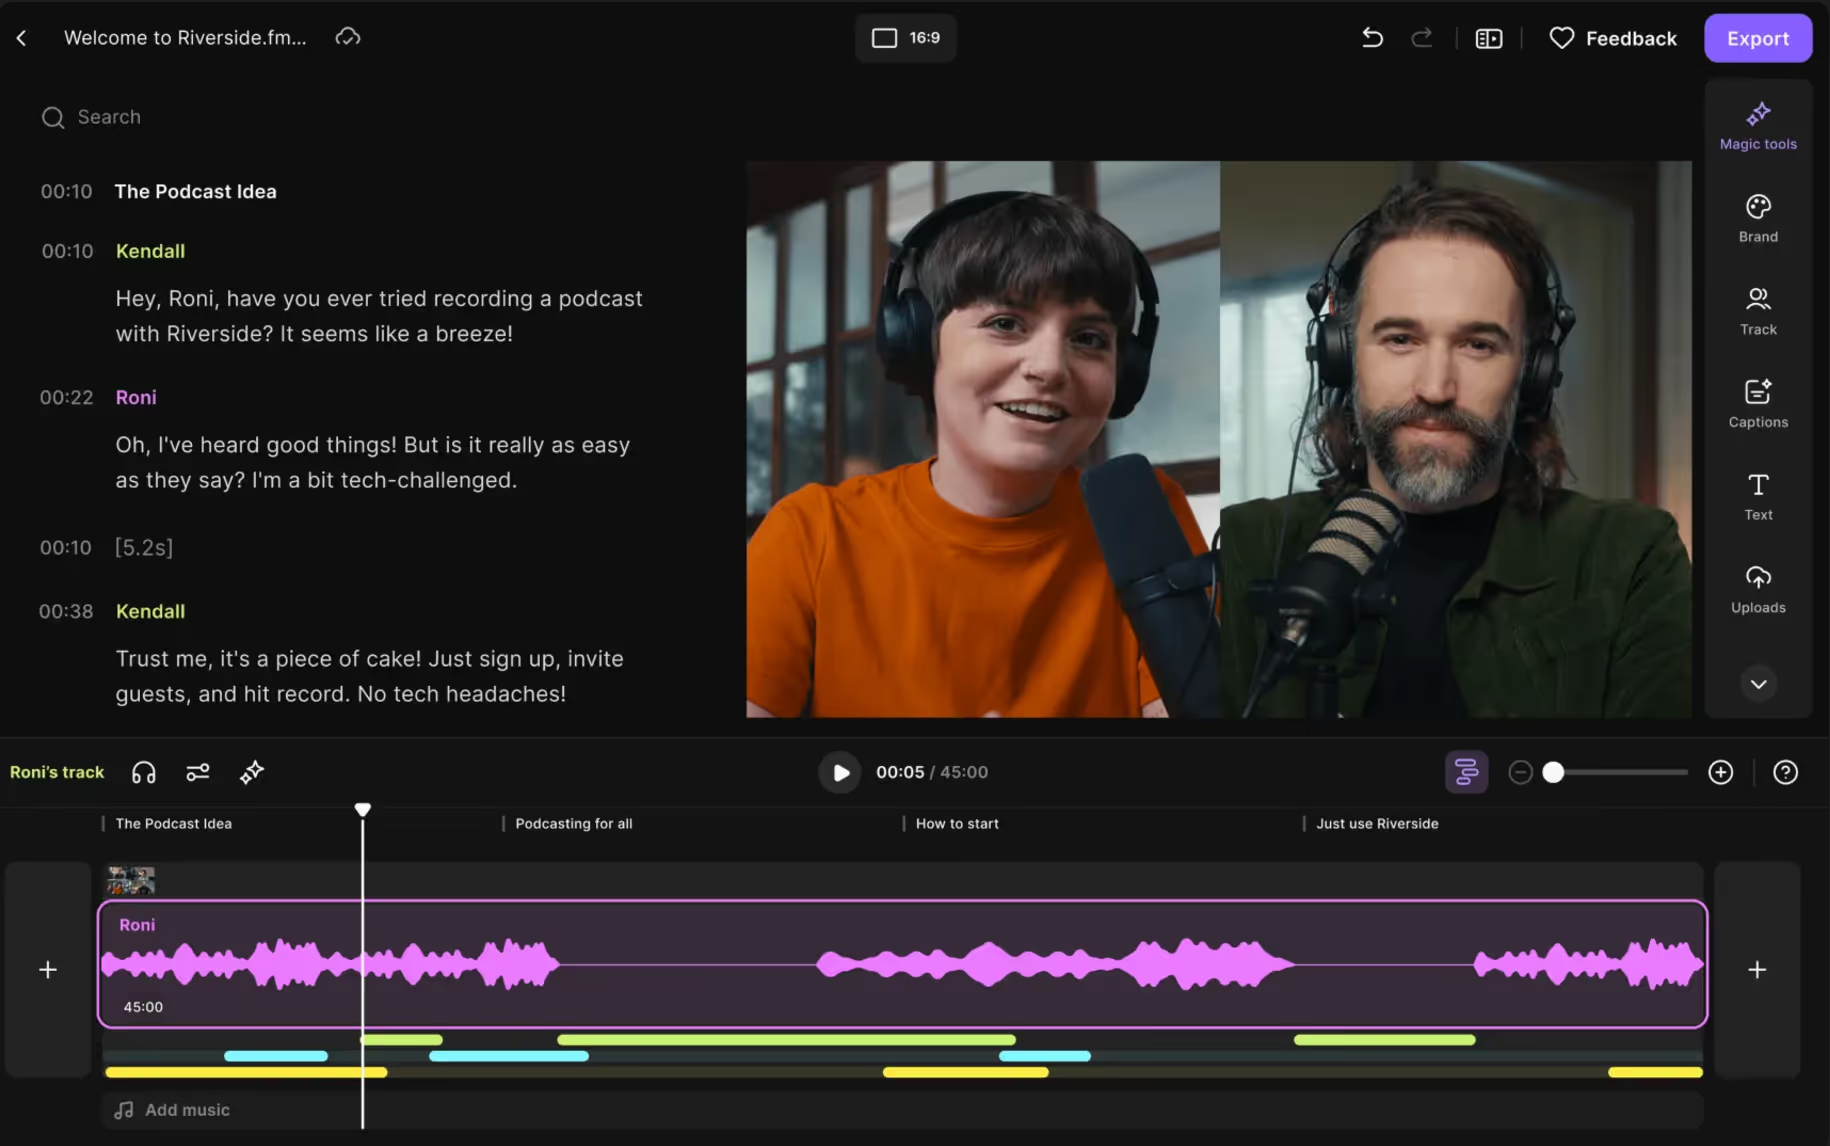
Riverside is a podcast and video recording platform with powerful editing capabilities. It’s designed to help creators record high-quality content remotely with guests, while also offering tools for post-production. Riverside captures video and audio in high quality (up to 4K), even with poor internet connections.
Why It Works:
Riverside shines in its ability to record studio-quality video and audio remotely. It’s perfect for podcasts and interviews that require excellent production quality, even when creators and guests are in different locations.
Pricing:
- Free: Includes 2 hours of recording per month.
- Standard: $15/month.
- Pro: $24/month.
Pros:
- High-quality video and audio recording.
- Great for remote interviews and collaborations.
- Works well even with low internet speeds.
- Multi-track recording for each guest.
Cons:
- Not as feature-rich for editing as other video editors.
- Free plan is limited to 1 hour of recording.
- Doesn’t offer many video editing tools beyond the basics.
Best For:
- Professionals needing multi-track recording and high fidelity.
6. InShot

InShot is a mobile video editing app designed for quick and easy editing. It’s particularly well-suited for creating social media content like Instagram Reels, TikToks, and YouTube Shorts. InShot offers tools for trimming, adding music, text, and filters, as well as a variety of aspect ratio options for different platforms.
Why It Works:
InShot is a popular choice for creators who need to quickly edit and share content on their phones. It’s simple to use and optimized for mobile-first content creation.
Pricing:
- Free: Limited access with ads.
- InShot Pro: $3.99/month or $14.99/year (removes ads and unlocks additional features).
Pros:
- Super simple and fast to use on mobile.
- Tons of filters, stickers, and music options.
- Great for social media content creation.
- No watermarks with the pro version.
Cons:
- Limited features compared to desktop-based editors.
- Available only on mobile.
- Some advanced editing tools are missing.
- Free version has ads.
Best For:
- Social media content creators who need quick edits on the go.
- Beginners or creators looking for an easy-to-use, mobile-based editing app.
Once You’ve Converted, Showcase Your Vertical Video with Clipara
Now that you’ve successfully converted your horizontal video into a vertical format, it’s time to showcase it in a way that captivates your website visitors.
Clipara is a sleek, no-code platform designed to help you effortlessly display videos in a way that aligns with your brand and boosts engagement. After converting your videos into vertical format, Clipara makes it super easy to embed them directly into your site. Whether it’s video testimonials, product demos, or user-generated content, Clipara’s customizable carousels, grids, and video layouts will make your content stand out while encouraging conversions.
Why Choose Clipara?
- Effortless Integration: Clipara’s plugin integrates seamlessly with your website—whether you're on Shopify, WordPress, or using a custom-built site. No code required.
- Sleek Carousels & Grids: Easily create dynamic, on-brand video carousels and grids that let users browse through your content with ease—just like the TikTok and Instagram experiences they love.
- Interactive Video Features: Add clickable products, shoppable elements, and other interactive features that keep your audience engaged and ready to make a purchase.
- Perfect for UGC: Clipara allows you to effortlessly display user-generated content (UGC) in a cohesive, professional manner, creating an authentic yet polished video experience for your site visitors.
Once your vertical videos are ready, let Clipara transform them into a visually appealing, engaging experience on your website. It’s all about turning your content into something that drives conversions, without any technical headaches.
Here’s an example of how you can showcase your vertical videos in a carousel using Clipara:
With Clipara, you can make the most of your vertical videos, creating sleek, interactive, and on-brand video displays that your visitors will love—and your business will benefit from.
Final Thoughts
Making a horizontal video vertical is a must if you’re aiming to get your content seen on mobile-first platforms like Instagram or TikTok. Whether you choose to crop, rotate, use smart tools, or add a background, there are plenty of ways to get the job done.
And if you're looking to display your newly edited vertical videos in a stylish way on your website, Clipara is a great tool to help you showcase them without slowing down your page. With its sleek video grids, carousels, and more, Clipara makes it easy to share and engage with your content, regardless of the format. You can get started for free here.
Now that you know how to turn your horizontal video into a vertical one, it's time to start creating and sharing more engaging content with your audience!


-min.avif)